 Pin It
 I'll never forget the Halloween party when my daughter insisted we needed something that would make all her friends gasp with delight. While scrolling through party ideas at midnight, I stumbled upon the perfect solution: a creamy skull and crossbones spread that's equal parts spooky and delicious. That night, I realized that the best party food isn't about complicated techniques—it's about creating a moment of pure fun that brings everyone together around the table.
I served this at a Halloween potluck last year, and watching the adults lean in closer to figure out what it was made from—before their faces lit up with recognition—was absolutely priceless. My neighbor asked for the recipe right there and then, and now it's become our annual tradition at every October gathering.
Ingredients
- Cream cheese, softened: This is your foundation, and letting it sit at room temperature for an hour before mixing makes all the difference. It spreads like butter and holds its shape beautifully.
- Sour cream: Just two tablespoons creates that silky, slightly tangy texture that keeps the spread from feeling heavy. I learned this trick from my aunt who said it's the secret to restaurant-quality dips.
- Garlic powder: A teaspoon adds gentle savory depth without overwhelming the delicate vegetables you'll be pairing with it.
- Lemon juice: The brightness cuts through the richness and keeps everything tasting fresh, not heavy.
- Salt and pepper: Season to taste at the end—this is where your personal touch comes in.
- Cucumber, sliced into rounds: These create natural, glossy features that look almost jewel-like on the platter.
- Red bell pepper, cut into strips: For the mouth and decorative elements—the red brings this skull to life visually.
- Black olives, halved: Perfect for eyes, and they stay exactly where you place them.
- Carrot, sliced and cut: Doubles as teeth and nose details, adding a little sweetness and bright orange contrast.
- Celery sticks or breadsticks: These form the crossbones underneath. I prefer celery because it's more forgiving and adds a nice fresh crunch when guests nibble.
- Fresh parsley or chives: Optional but worth the garnish—it adds a professional finishing touch and a subtle herbaceous flavor.
Tired of Takeout? 🥡
Get 10 meals you can make faster than delivery arrives. Seriously.
One email. No spam. Unsubscribe anytime.
Instructions
- Make Your Base:
- Combine the softened cream cheese, sour cream, garlic powder, lemon juice, salt, and pepper in a medium bowl. Mix it together until you have a smooth, spreadable consistency that feels light and airy. If it seems a little stiff, give it another minute of stirring—you want it almost cloud-like.
- Shape Your Skull:
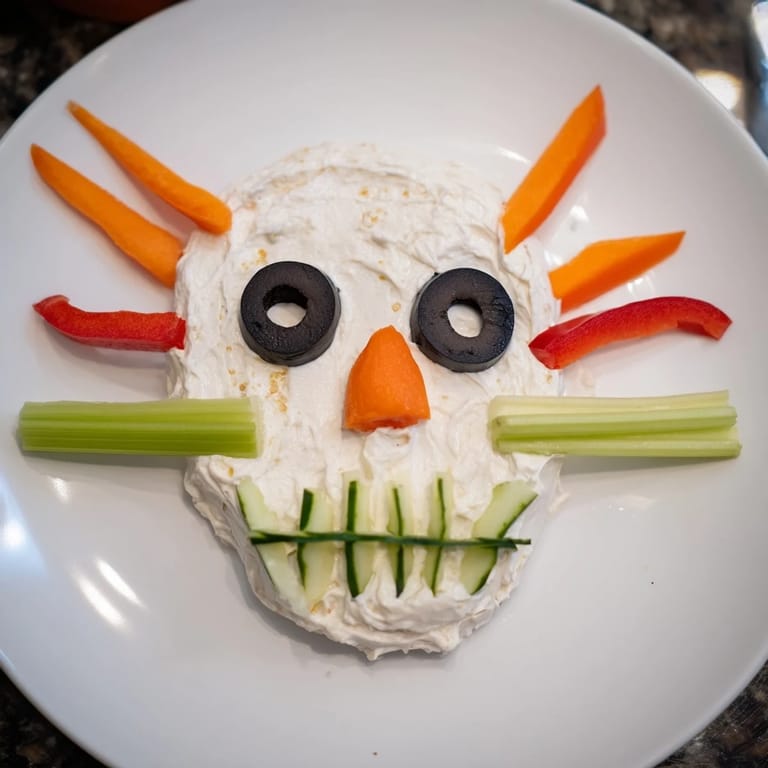
- On your large serving platter, use a spatula to mound and shape the cream cheese mixture into an oval skull form. Think of it like sculpting—smooth out the surface, create a slight point at the top for the crown, and leave the bottom more rounded. This part is genuinely fun and forgiving; if it's not perfect, that's exactly the point.
- Build the Crossbones:
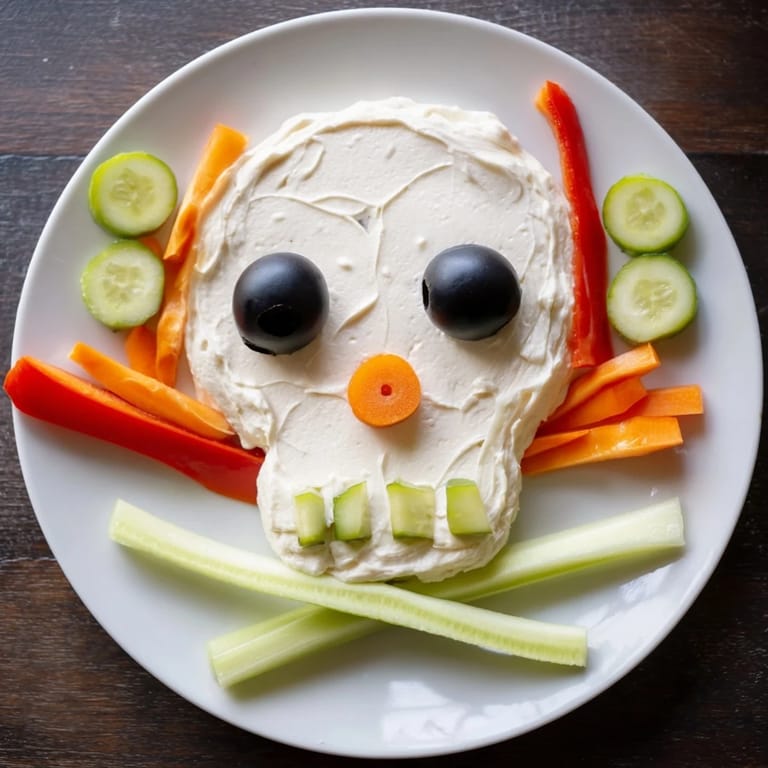
- Take your celery sticks or breadsticks and arrange them in an X shape underneath the bottom of the skull. They should look like they're supporting the skull from below, which is both creepy and the perfect resting place for your dippers.
- Set the Eyes and Face:
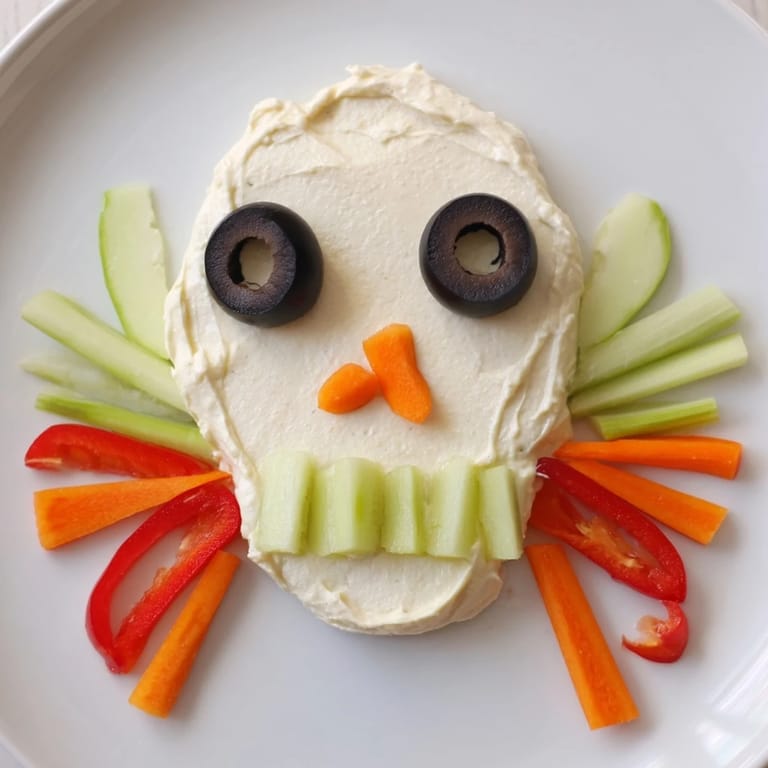
- Place the black olive halves where the eyes should go. Position a small carrot piece or olive slice for the nose. Now arrange those red bell pepper strips into a grin—make it playful, menacing, or silly—it's your skull. Add carrot rounds as teeth along the bottom.
- Layer Your Details:
- Use remaining vegetable pieces—more cucumbers, carrots, peppers—to fill in empty spaces and add color and dimension. Step back and look at your creation. Does it feel complete? Are the features balanced?
- Finish and Chill:
- Sprinkle fresh parsley or chives over the top for a polished look. Place it in the refrigerator until serving, which also helps the spread firm up just enough to stay in place when guests start dipping. Serve surrounded by extra crackers, pita chips, or vegetable crudités.
 Pin It
 There's something magical about watching a room full of people—kids and adults alike—lose their minds over something you've made with your own hands. That moment when someone says, 'Wait, is this actually delicious?' makes all the prep time feel completely worth it. Food like this reminds us that cooking is really about creating memories, one platter at a time.
Flavor Combinations That Work
The beauty of this spread is how adaptable it is to your taste preferences. I've found that the tanginess of sour cream paired with the gentle garlic creates a savory backbone that lets the fresh vegetables shine. The lemon juice is almost invisible but absolutely essential—it prevents the spread from tasting flat or one-dimensional. If you want more punch, try stirring in finely chopped fresh dill or adding a tiny pinch of cayenne pepper for unexpected heat. I once added some finely minced sun-dried tomatoes to the cream cheese mixture, and it transformed the whole thing into something more elegant without losing that fun Halloween spirit.
Making It Your Own
This recipe is your starting point, not your finish line. Some of my best kitchen moments have come from people taking this skull and making it completely their own. One friend used hummus instead of cream cheese for a healthier version. Another created a cheese skull using different varieties of sliced cheese arranged over a base of herbed ricotta. The vegetable choices are entirely up to you—use whatever looks good at your market that day. Cherry tomatoes work beautifully, as do radish slices and thin zucchini rounds. I've even seen people use edible flowers around the edges for an unexpectedly gorgeous twist.
Storage and Serving Tips
Make this spread up to eight hours ahead of time, which means you can focus on the vegetables and final assembly closer to party time. Keep it covered in the refrigerator until about thirty minutes before guests arrive—a slightly chilled spread actually holds its shape better than one straight from the cold. After the party, any leftover spread keeps beautifully for three to four days in an airtight container and makes an incredible dip for vegetables or crackers the next day. I learned to always make extra because people ask for it by the spoonful long after the party ends.
- Set out the platter at least fifteen minutes before your guests arrive so it loses that fresh-from-the-fridge chill
- Keep extra vegetable dippers nearby in case people love this more than you expected
- If your skull starts to look tired after an hour of dipping, quickly refresh the top with a fresh layer of parsley
 Pin It
 This skull became so much more than a recipe in our kitchen—it's tradition, it's laughter, and it's proof that the simplest ideas, executed with a little creativity and heart, make the biggest impact. Make this for your people, and watch what happens.
Recipe Questions & Answers
- → How do you shape the spread into a skull?
Smooth the creamy mixture into an oval shape on a platter, then decorate with vegetable pieces to mimic facial features.
- → Can this spread be made gluten-free?
Yes, by using only celery sticks instead of breadsticks, the dish remains gluten-free.
- → What ingredients add flavor to the creamy base?
Garlic powder, lemon juice, salt, and pepper blend into cream cheese and sour cream to create a tangy, savory flavor.
- → Which vegetables are used for decoration?
Cucumbers, red bell peppers, black olives, carrots, and celery sticks form the skull and crossbones design.
- → What serving suggestions do you recommend?
Serve chilled with assorted crackers, pita chips, or fresh vegetable dippers for texture and contrast.
- → Can herbs be added for extra flavor?
Yes, fresh parsley or chopped chives can be used as garnish for added aroma and color.